How to setup python environment 101
tools
container
Python environment
Set Up the Project Root
a directory that contains all the files related to our project
my_project/
rename the my_project with your project name.
Create a Virtual Environment
A virtual environment keeps your project dependencies isolated from other projects, helping to avoid version conflicts.
python -m venv venv or python3 -m venv venv
This will create a venv folder venv\Scripts\activate and help our dependencies will be installed within this environment.
Define the Core Directory Structure
We can include a directory for your package/ module, a tests/ directory, and setup/configuration files at the root level.
  my_project/
  │
  ├── my_package/           # Main package directory
  │   ├── __init__.py       # Makes the directory a package
  │   ├── module1.py
  │   ├── module2.py
  │   └── utils.py
  │
  ├── tests/                # Tests for each module or functionality
  │   ├── __init__.py
  │   ├── test_module1.py
  │   ├── test_module2.py
  │   └── test_utils.py
  │
  ├── venv/                 # Virtual environment directory (ignored in .gitignore)
  │
  ├── requirements.txt      # Lists project dependencies
  │
  └── README.md             # Project description and usage
Details
Breakdown of Each Component
- my_package/: Contains the core code for your project.
- tests/: Houses unit tests for each module, which will help with code verification.
- requirements.txt: Lists the dependencies. Generate it with pip freeze > requirements.txt.
- README.md: Describes the project and usage instructions, which helps others understand how to use it.
Write the __init__.py File
The init.py file is used to initialize a Python package. Place it in each directory we want to treat as a package. This file can also define what gets imported when we import the package.
Example ‘__init__.py’ for ‘my_package/’
# my_package/__init__.py
from .module1 import function1
from .module2 import function2
Now we can use from my_package import function1 directly.
Add Configuration Files
Certain configuration files help automate testing, linting, and deployment.
-
.gitignoreAdd a.gitignorefile to specify files and directories that Git should ignore.venv/ __pycache__/ *.pyc -
requirements.txtFor dependency management, list packages inrequirements.txt:pip install some_package pip freeze > requirements.txt
Set Up Testing
Use pytest or unittest for testing. To get started, create test files within the tests/ directory.
Example test file (tests/test_module1.py)
# tests/test_module1.py

import pytest
from my_package.module1 import function1

def test_function1():
    result = function1()
    assert result == expected_output  # replace with actual expected output
Run tests from the command line:
pytest tests/
Create a setup.py for Packaging
If you want to distribute your package, add a setup.py file, which tells Python how to build and install the package.
Example “setup.py”
from setuptools import setup, find_packages

setup(
    name="my_project",
    version="0.1",
    packages=find_packages(),
    install_requires=[
        "some_package>=1.0.0",
    ],
)
To install the package locally:
pip install -e .
This enables importing my_package without specifying the full path.
Document the Project
Documentation makes it easy for others (and ourself) to understand and use the project. Update the README.md to provide an overview, installation instructions, and usage examples.
Example “README.md”
# My Project

## Overview
This project does XYZ.

## Installation
1. Clone the repository.
2. Install dependencies: `pip install -r requirements.txt`.

## Usage
```python
from my_package import function1
function1()
---
## Final Project Structure Example
Your final project structure should resemble:
```plaintext
my_project/
│
├── my_package/           # Main package directory
│   ├── __init__.py
│   ├── module1.py
│   ├── module2.py
│   └── utils.py
│
├── tests/                # Tests directory
│   ├── __init__.py
│   ├── test_module1.py
│   ├── test_module2.py
│   └── test_utils.py
│
├── venv/                 # Virtual environment
│
├── requirements.txt      # Dependencies list
│
├── README.md             # Project documentation
│
└── setup.py              # Optional: for packaging and distribution
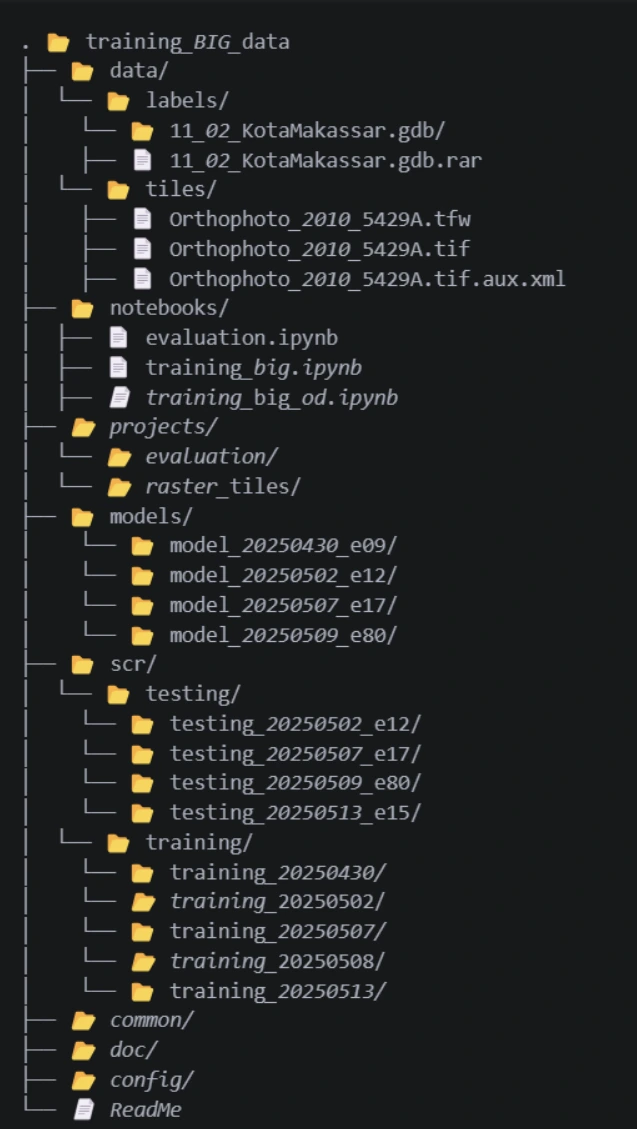
Example
This project code contains:
- data/
- notebooks/
- project/ (ArcGIS pro project collection)
- scr/
- training/
- testing/
- models/
- doc/
- config/
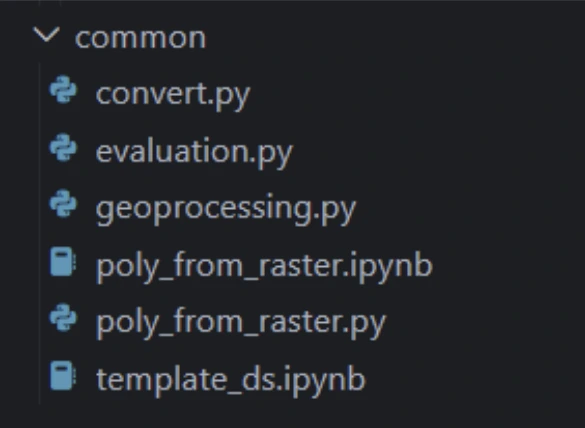
- common/
- ReadMe
By using this format, we can efficiently share project code between engineers and clients while excluding high-volume files, such as raw data and training folders.
This is considered good practice to systematically store and manage scripts, notebooks, models, and related resources for any projects—whether in a public or private repository that needs support for collaboration, version control, and reproducibility.
Use Case
The best use case from this example is an initiation to build a common script and module for pre-processing, post-processing and inference process and even storing modelbuilder ArcGIS Pro in python script.
by using this concept, we can reproduce, governing and standardizing our workflows into scalable and production-ready code.
Example of ReadMe
# 🌍 Common GIS Utilities for Data Science Projects

This repository contains commonly used code, tools, and templates to support geospatial data science and GIS engineering projects. It is intended as a centralized resource to promote reuse, consistency, and collaboration across multiple geospatial initiatives.

---

## What does this do?

This repository provides:

- Shared utility scripts for spatial data processing
- Common configuration files and environment templates
- Reusable functions for geospatial analysis (e.g., coordinate transformations, spatial joins)
- Standardized plotting templates for maps and visualizations
- Common workflows and helper functions (e.g., shapefile handling, raster operations)
- Sample notebooks demonstrating typical GIS workflows

It serves as a foundation for various projects by offering ready-to-use components and avoiding duplication of effort.

---

## Requirements

To use the tools and scripts in this repository, ensure the following are installed:

### Python (Recommended: >=3.9)

**Python packages:**
- pandas

---

## Contributing
Contributions are welcome! Please follow these steps:

- Fork this repository.
- Create a new branch with a meaningful name.
- Add your code and relevant tests.
- Ensure your code is clean and consistent using the pre-commit hooks.
- Open a pull request and describe your changes.

---

## Maintainers

This repository is maintained by the Geospatial Data Science & Engineering Team.

Main point of contact:

1. [Imanul jihad – Data Scientist](ijihad#esriindonesia.co.id)

---

## Contributors

Thanks to all who have contributed to this repository!

- imanul jihad

Want to be listed here? Start contributing! 💪
# Deep Learning Project Template for Geospatial Applications

This repository is a **template** for deep learning-based projects, particularly designed for geospatial and remote sensing tasks. It offers a standardized project structure, pre-configured utilities, and common practices to streamline model development, training, evaluation, and deployment workflows.

---

## What does this do?

This template provides:

- 📂 Modular project folder structure for clarity and scalability
- 📜 Common utility functions for data loading, preprocessing, and augmentation (especially for raster/vector geospatial data)
- 🧠 Ready-to-use training and evaluation loops (PyTorch-based)
- 🗺️ Integration for geospatial formats: GeoTIFFs, shapefiles, raster masks, etc.
- 🧪 Example scripts and Jupyter notebooks for prototyping
- 🧹 Pre-configured code formatting and linting with pre-commit
- ✅ Version control-friendly with `.gitignore`, `README`, and `requirements.txt` included

Use this template to **jump-start deep learning projects** in environmental monitoring, land cover classification, object detection, and other GIS-AI fusion use cases.

---

## Requirements

> This project uses Python 3.8+ and PyTorch.

### Core dependencies:

```bash
# Install via pip
pip install -r requirements.txt
Key libraries:
- torch, torchvision – Deep learning framework
- arcpy
- arcgis
Contributing
We welcome contributions from the team!
Contribution Guidelines
- Create a new branch for your feature or fix.
- Ensure your code is formatted and linted.
- Write or update documentation and example notebooks if applicable.
- Submit a pull request with a clear description of your changes.
Project Directory Structure
This project follows a standardized folder layout to organize spatial data, models, training/testing datasets, and scripts for reproducibility and collaboration.
project-root/
├── data/           # Raw and processed spatial data
│ ├── labels/       # Label files (e.g., annotated shapefiles, label rasters)
│ ├── raster/       # Raster data (e.g., satellite imagery, orthophotos)
│ └── polygon/      # Polygon shapefiles (e.g., land parcel, palm crown boundaries)
│
├── notebooks/      # Jupyter notebooks for EDA, visualization, and experiments
│
├── projects/       # ArcGIS Pro project files (.aprx), map layouts, and toolboxes
│
├── scr/            # Python scripts for data preprocessing, training, and evaluation
│ ├── training/     # Training dataset (images, labels, features)
│ └── testing/      # Testing dataset for model validation
│
├── models/         # Saved models (e.g., .pth, .dlpk, .onnx)
│
├── doc/            # Documentation, papers, reports, or presentations
│
├── config/         # Configuration files (e.g., YAML, JSON) for pipeline parameters
│
├── common/         # Shared utilities (e.g., custom functions, constants)
│
└── README.md       # Project overview, installation, and usage instructions
Each folder serves a distinct purpose to support a clean and scalable workflow, particularly in geospatial deep learning projects. By using this format, we can efficiently share project code between engineers and clients while excluding high-volume files, such as raw data and training folders.
Maintainers
This template is maintained by the GIS & AI Engineering Team.
Contributors
Thanks to all who have contributed to this repository!
- imanul jihad
Want to contribute? See Contributing.
```