DBT 101
data engineering
data modeling
What is dbt?
dbt transforms raw warehouse data into trusted data products. We write simple SQL select statements, and dbt handles the heavy lifting by creating modular, maintainable data models that power analytics, operations, and AI – replacing the need for complex and fragile transformation code.
dbt is the industry standard for data transformation, helping teams work faster and produce higher-quality data. As we build in dbt, our project creates structured context — lineage, tests, contracts, metrics, and governance — that explains how our data connects, what it means, and what changes may affect.
We can use dbt and its framework to: - Centralize and modularize our analytics code, while also providing our data team with guardrails typically found in software engineering workflows. - Collaborate on data models to safely deploy and monitor data transformations in production. - Apply software engineering best practices like version control, testing, modularity, CI/CD, and documentation to analytics workflows. - Build idempotent transformations that are safe to rerun and produce consistent results.
dbt framework
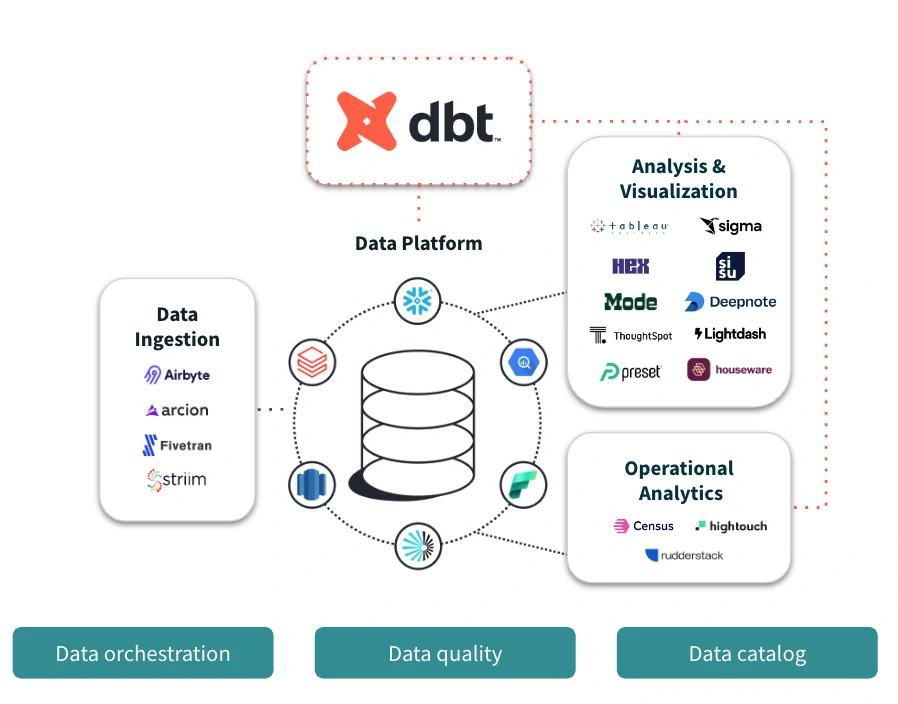
Use the dbt framework to quickly and collaboratively transform data and deploy analytics code following software engineering best practices like version control, modularity, portability, CI/CD, and documentation. This means anyone on the data team familiar with SQL can safely contribute to production-grade data pipelines.
The dbt framework is composed of a language and an engine:
- The dbt language is the code we write in our dbt project — SQL select statements, Jinja templating, YAML configs, tests, and more. It’s the standard for the data industry and the foundation of the dbt framework.
- The dbt engine compiles our project, executes our transformation graph, and produces metadata. Today, the current Rust-based version generation is v2. By default, installing dbt gives us SQL comprehension, editor features, and richer development workflows.
Why use dbt
As a dbt user, our main focus will be on writing models (select queries) that reflect core business logic – there’s no need to write boilerplate code to create tables and views, or to define the order of execution of our models. Instead, dbt handles turning these models into objects in our warehouse for us.
- No boilerplate: Write business logic with just a SQL select statement or a Python DataFrame. dbt handles materialization, transactions, DDL, and schema changes.
- Modular and reusable: Build data models that can be referenced in subsequent work. Change a model once and the change propagates to all its dependencies, so we can publish canonical business logic without reimplementing it.
- Fast builds: Use incremental models and leverage metadata to optimize long-running models.
- Tested and documented — Write data quality tests on our underlying data and auto-generate documentation alongside our code. Software engineering workflows: Version control, branching, pull requests, CI/CD, and package management for our data pipelines. Write DRYer code with macros and hooks.
- AI-powered development: Use dbt Wizard to investigate, build, validate, and ship from natural language. dbt Wizard is grounded in our project’s full context, validates its own work against lineage and tests, and includes governance and audit trails by default.
How to use dbt
If the company has a dbt repository that contains all elements, we could clone that dbt repository into our local with these prerequisites:
- GIT
- Visual Studio Code
- Public key of repository
- Dbeaver (optional for database management)
Install DBT at local env
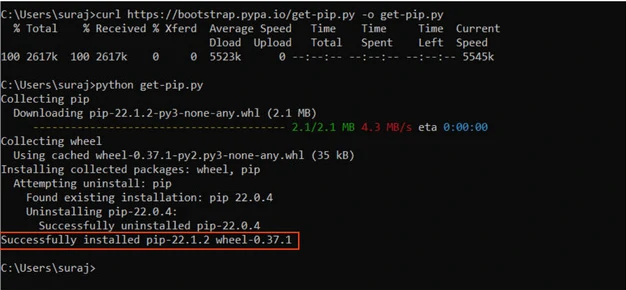
- Install pip using the command →
curl https://bootstrap.pypa.io/get-pip.py or get-pip.pyin the Visual Studio terminal. - Or we could use
pip install dbt-coreand it supports libraries such aspip install dbt[postgres]orpip install dbt[clickhouse]. - Once the process is complete, continue with the command →
python3 get-pip.py - Make sure that after the execution is complete, it appears like this in our terminal:
- Still in the same terminal, ensure we are inside the clone repository folder. The next step is to execute the following command:
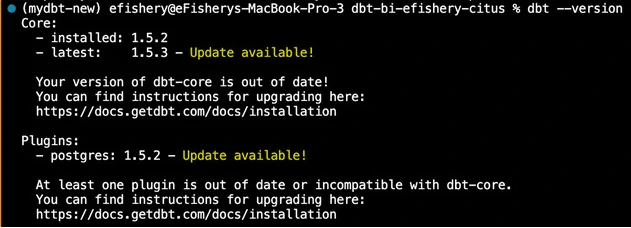
pip install -r requirements.txt. Wait a few moments for the dbt installation process to complete. This will install all support libraries for dbt on our local. - To verify that dbt has been successfully installed on our laptop, execute the command
dbt --version. - Replace the connection string in
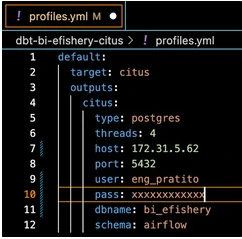
profiles.yamlwith the connection string provided by the DE team, as shown in the example below, then save the file. - Try running the
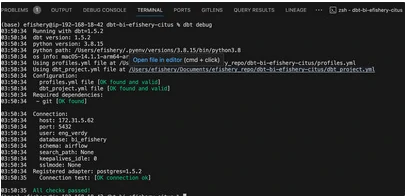
dbt debugcommand in the terminal. Make sure that “All checks passed” appears after execution.
Create development branch
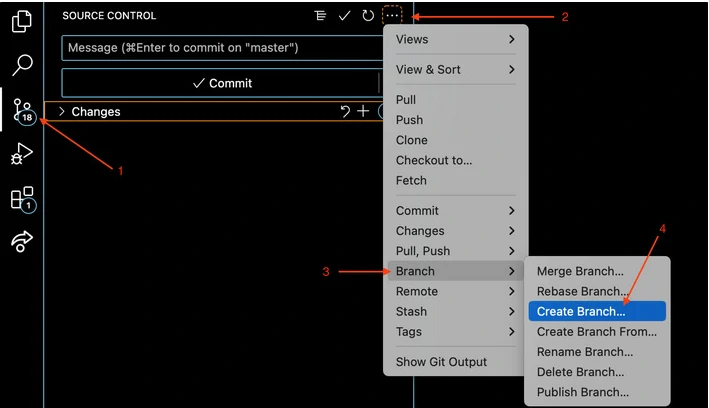
- Don’t forget to create a new branch when starting to create or edit a model by following the steps shown in the image below.
- Follow the branch naming convention found on this website. This serves to distinguish the actions we will perform within the development branch.
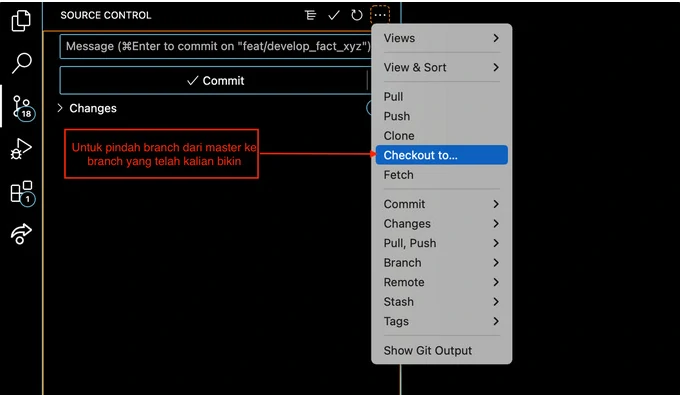
- Once the new branch has been created, we can check out—or switch to—that branch.
- Once we have checked out, we can start developing dbt models.
Developing Models
The process of developing models in local dbt is essentially the same as in dbt Cloud: we create queries in .sql files and define their metadata in .yaml files, while organizing them into the appropriate folders based on the table type—specifically, fact and dimension tables are stored in ../models/warehouse, and mart tables are stored in ../models/mart.
Testing and Running Queries
- Testing models is also performed just as it is in dbt Cloud: by executing the command
dbt run --select fact_xx_yyin the Visual Studio Code terminal. -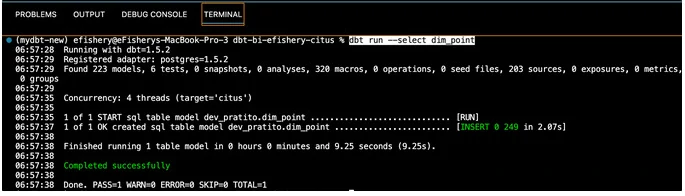
- We can view and sanitize the tables that have been executed via DBeaver within our respective
dev_schemas. -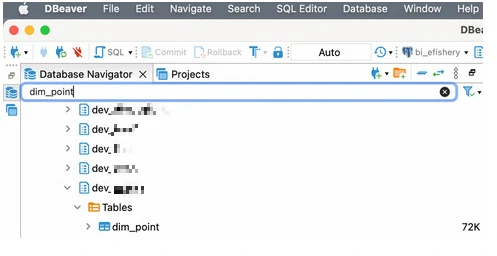
Deploy our dbt Model / PR
- Before proceeding with the PR, ensure our model has a status of Completed successfully, as shown in the image above.
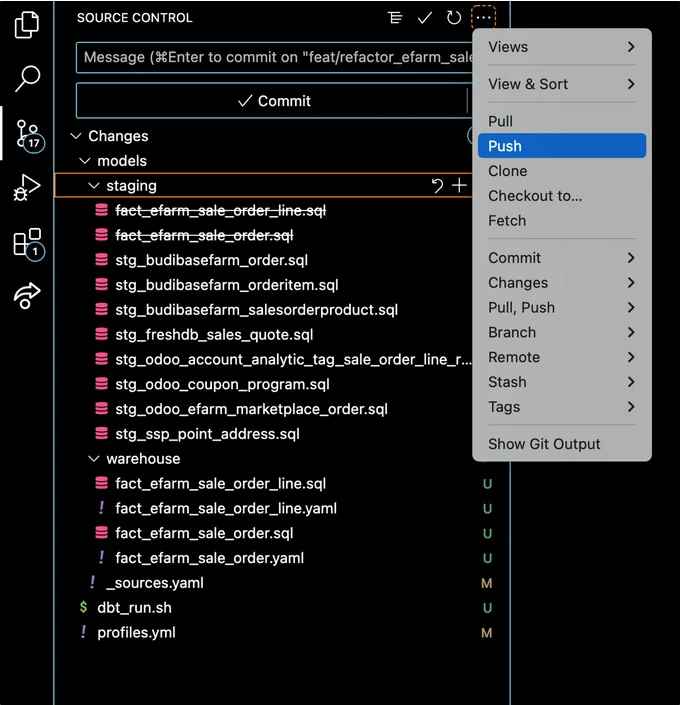
- In the source control menu, select the files we wish to commit using the
+button next to the file name, enter a commit message, and then click commit. -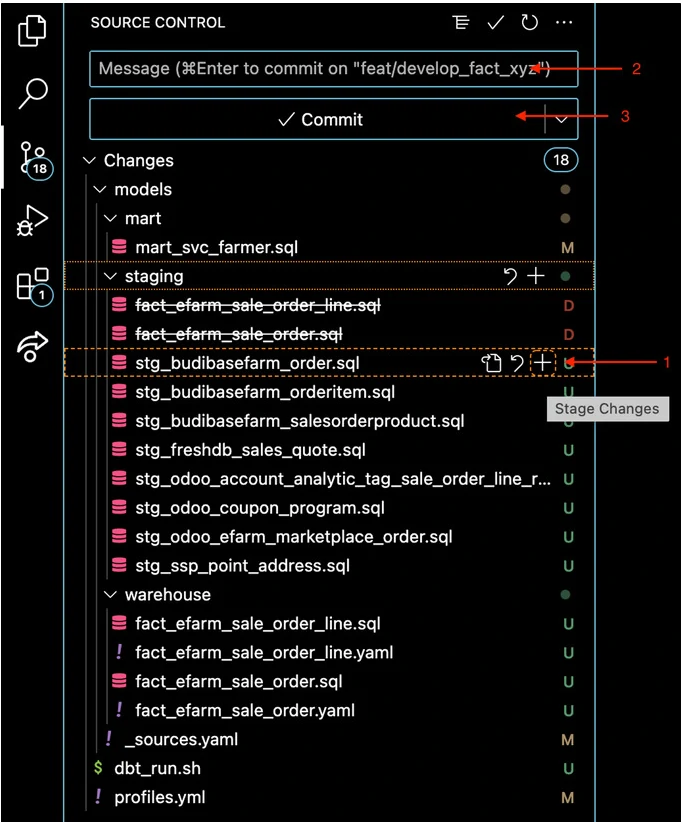
- After committing, the final step is to push our code to create a PR in the repository. -